
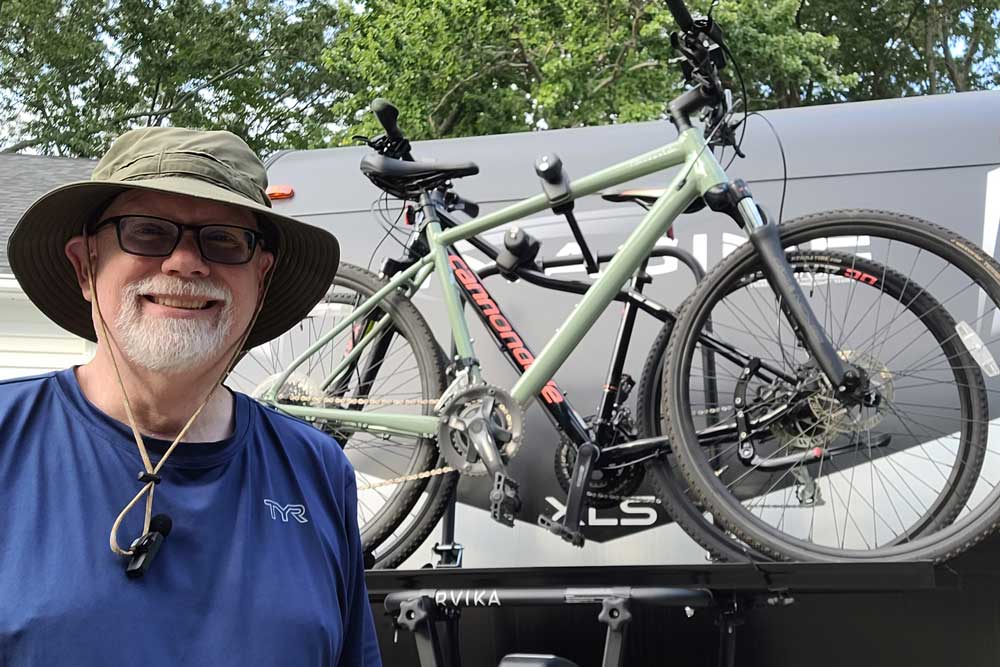
Arvika Bike Rack Installation
I just completed installing an Arvika bike rack on our new Imagine travel trailer. I’m looking forward to bringing bikes camping this summer and for years to come. I learned a few lessons during the Arvika installation that I can share with you to help make the job a little easier if you opt to add a bike rack to your camper.
We recently got a new Imagine 22RBE camper, and without a bike rack we missed being able to explore campgrounds and nearby trails on our bikes. We had good luck with an Arvika bike rack before, first on our Jayco camper and later on our Grand Design Transcend, so choosing another Arvika rack for this travel trailer felt like a natural fit. The model we chose holds 2 bikes, which is a good match for how we camp right now.
We have had a good experience with Arvika racks, but they are not the only option for bringing bikes camping. If you are still comparing choices, we shared a few alternatives in our post 8 Great RV Bike Rack Options. However, we still like the Arvika as it offers better stability for our bikes and it frees up space for a kayak rack on the truck.
Another advantage for many is that an over-propane-tank bike rack options adds hitch weight rather than adding weight at the back of the camper. Than can help with ensuring a more stable towing experience. However, before adding any RV bike rack to the front of a camper, be sure to check your hitch or tongue weight. Extra weight on the front of a travel trailer can affect towing, so it is worth taking a few minutes to measure it. We shared an easy method at on our post Measuring Tongue Weight.
Arvika Bike Rack Installation Tips
The instructions say to allow two hours for installation. If you are skilled and your trailer setup is straightforward, that may be enough time. You may want to allow for a bit more time. And bring your patience, especially if you do projects like this infrequently.
Before you get started, it may be helpful to have the right tools for the job. I found it helpful to have the following:
- Ratchet set with sockets
- Deep socket 9/16 inch
- Tape measure
- Rubber mallet
The instruction manual is mostly picture-based, a bit like an Ikea manual. It is generally clear, but there are a few points where it helps to slow down and think through the diagram before moving on to the next step. While I completed the installation myself, it would have been easier with two people during a few of the steps.
1. Start with the base unit
Start by installing the base unit on your camper’s A-frame. Find the best place to install it given your camper’s setup. I put might between the sway bar brackets and the battery bank tray. Given the limited space, that was really the only option.
You’ll likely have wiring on one side of the A-frame. Be sure to give it clearance so that nothing gets damaged and that it won’t rub on the bike rack base when you are heading down the road.
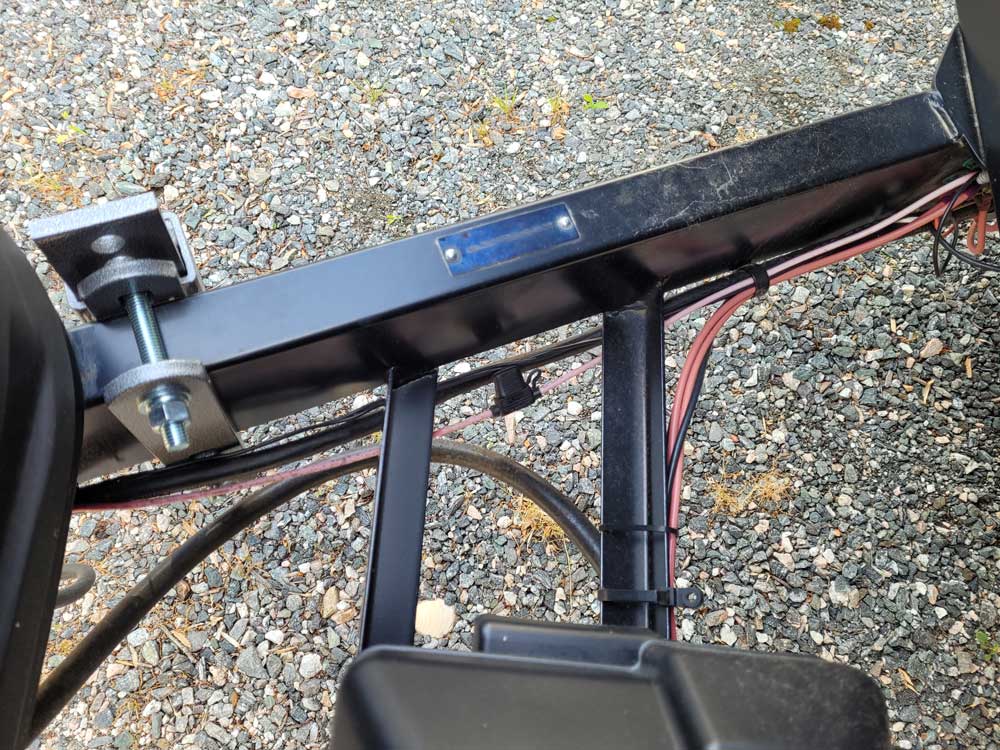
Before you fully tighten the base, check spacing between the two supports to ensure it matches the distance specified in the manual. Then tighten it fully so that you can move on to the next step.
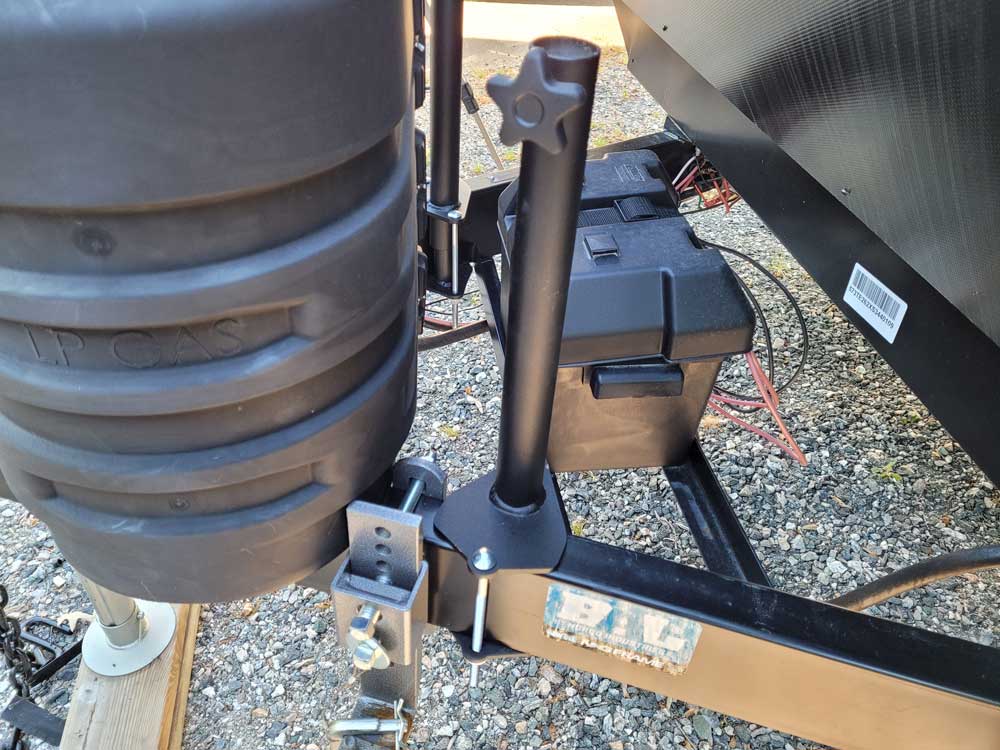
As the bolts extend below the base unit, a regular ratchet is unlikely to work. A deep socket 9/16 inch worked well for me and made it easy to tighten the base into place. If you don’t have one, you can pick one up an any hardware store for about $10-15. Be sure that the driver size matches your wrench or you can get an adapter if needed. For convenience, here is a link to a Craftsman 9/16 deep socket for a wrench with a 3/8 inch drive on Amazon which might work for you. Note: affiliate link.
2. Add the upper and secondary brackets
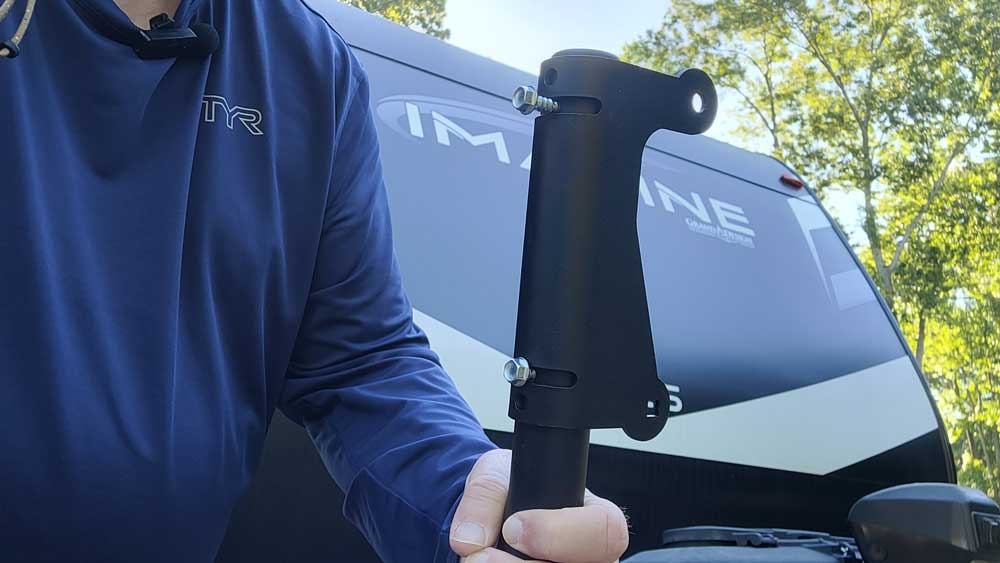
Next add the secondary brackets. There are pre-drilled holes for the upper bracket, and the screws fit into a channel that allows some adjustment if needed. That flexibility can be helpful as you fine-tune the fit. I recommend not tightening the screws fully until you ensure everything is adjusted to the right fit on your camper.
3. Get help when placing the main rack
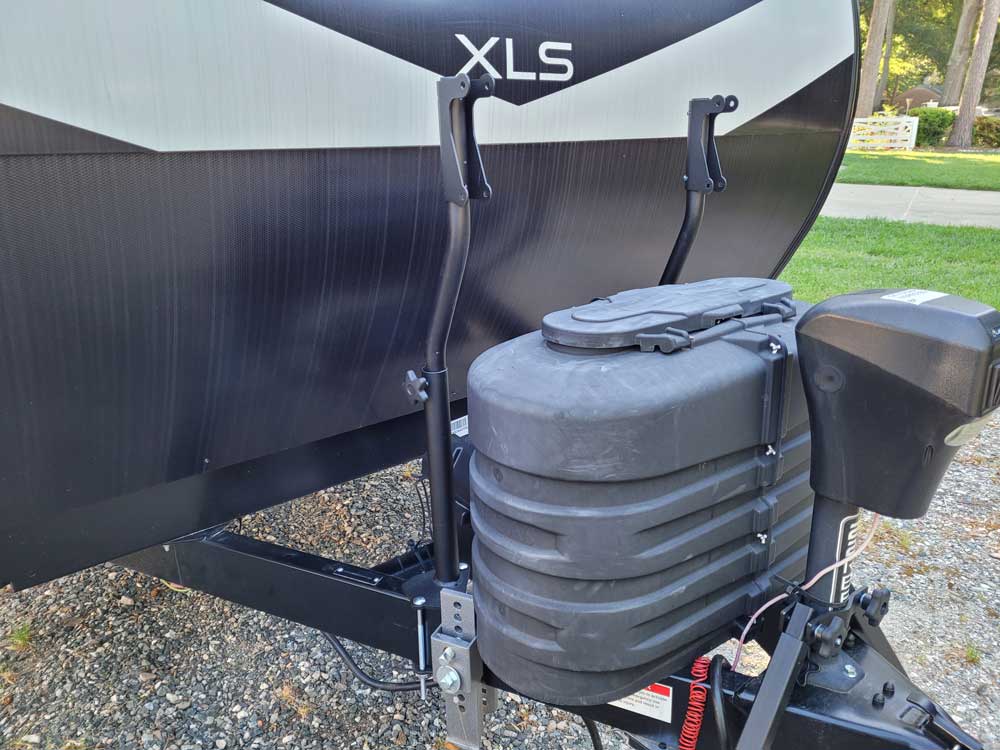
This is one of the steps where having 2 people would really help. The tubes of the rack slide into a bracket on each side, and you need to position washers between the tube and the bracket while inserting the bolt. While holding the rack and positioning it to be level across both supports, insert the tube into the bracket, slide a bolt through making sure there is a washer between each side of the tube and the bracket. Finally, add a washer and nut to the other side. I managed it alone, but a helper would make it much easier to guide the rack into place and keep everything aligned.
4. Install the front supports
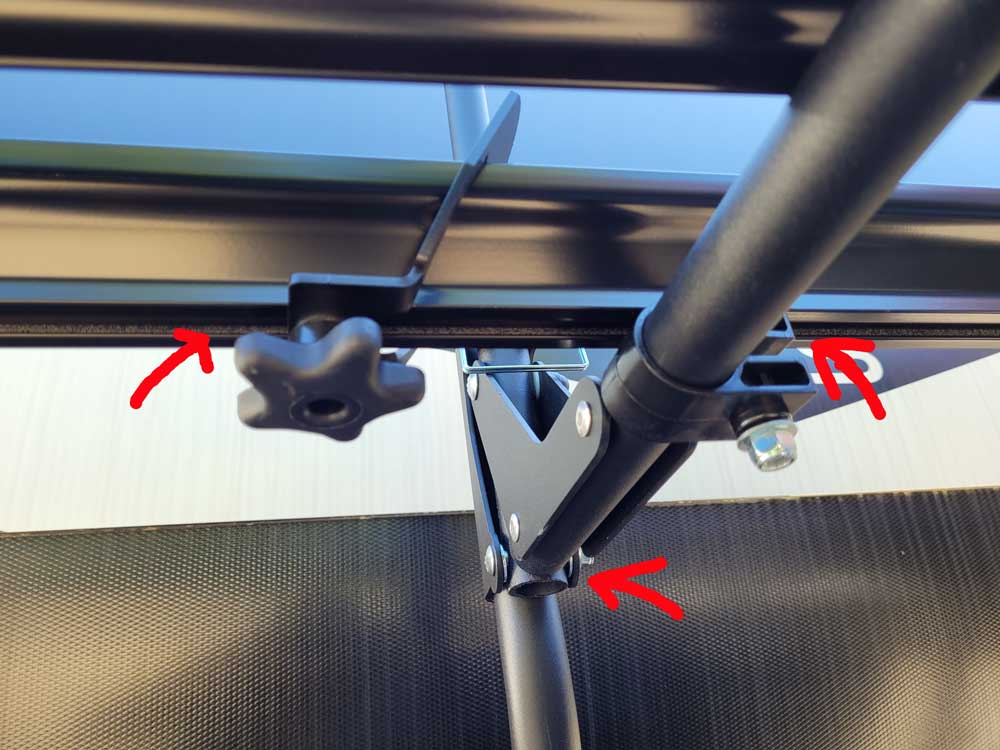
Add the front supports next. They help give the rack enough support, especially if you are carrying heavier bikes. These supports install with bars that surround the jack, and the tube-within-a-tube design allows you to adjust the height. Once adjusted, the supports connect to the front of the main rack component.
5. Add gutters and end caps
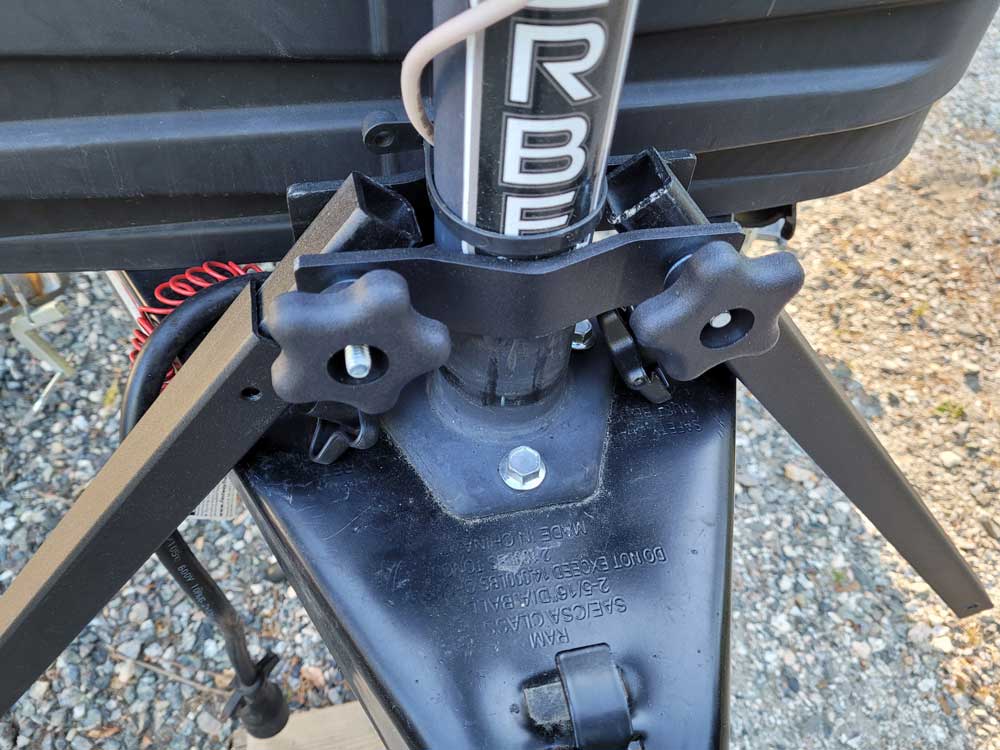
The gutters, or trays, are where your bike tires sit. You’ll install one for each bike. Arvika provides a plastic clip that goes over the tube and where the bolts for the trays will secure it in place.
There is a channel along the bottom of each tray. For each item like a bike wheel stop, the head of a bolt will slide into the channel and then be secured by a nut or knob. Add both trays and secure them to the rack.
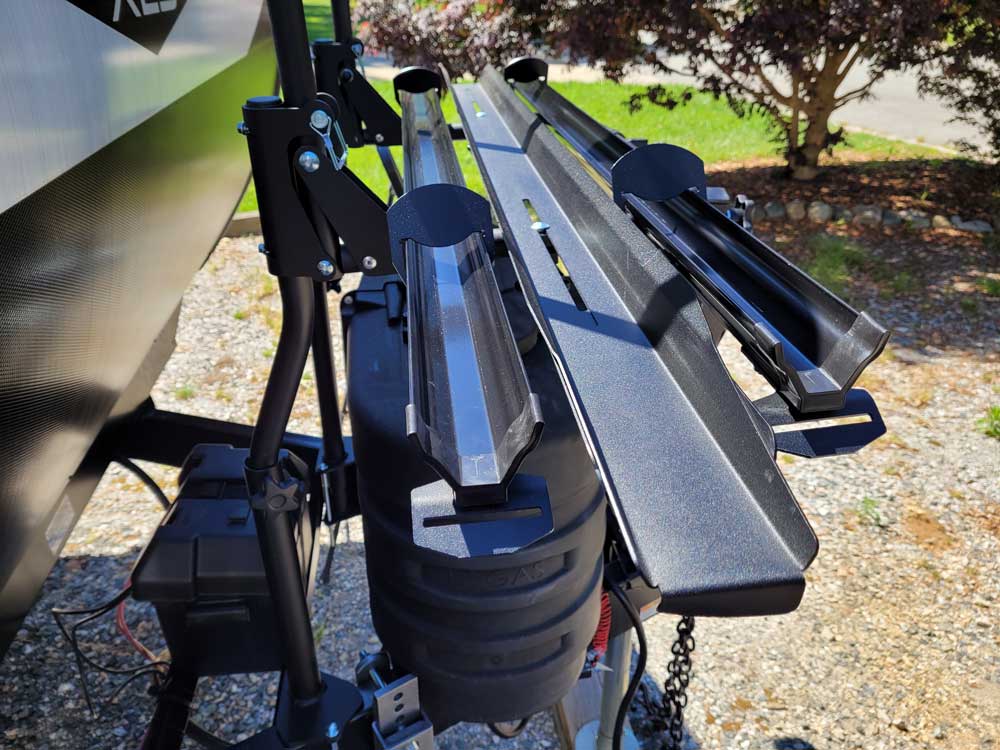
Be sure to install all components on the trays before adding the end caps. We opted for the optional bike ramp which has a connection on one end of each tray. Once everything is in place, add the end caps. They’ll likely be pretty snug. I found that it helps to start from the bottom and gently work your way up. A few light taps with a rubber mallet helps ensure they are fully installed.
Final Thoughts on The Rack Installation
We love having an Arvika rack so we can take our bikes with us when we camp. Based on past experience, we expect this one to last us for years to come. However, I’m glad that the installation is done. For me, it took a bit longer than the two hours indicated, but that might just be because I don’t do projects like this everyday. With the right tools and a bit of patience, the rack is in place and seems secure. I can’t wait to give it a try.
If you encounter any challenges or have questions, reach out to Arvika. We’ve had good customer support from them in the past so I’m sure they’ll guide you if needed.
Arvika Bike Rack FAQ
Is the Arvika bike rack hard to install?
The Arvika bike rack is not especially difficult to install, but it does take some patience. The instructions are mostly picture-based, and a few steps are easier if you slow down and study the diagrams before moving on. It is a manageable DIY project for many RV owners, especially if you have basic tools.
How long does Arvika bike rack installation take?
The instructions say to allow two hours for installation. If you are skilled and your trailer setup is simple, that may be enough time. Many people, though, will want to allow more time so they can work carefully, especially if wiring or other accessories make access tighter.
Can one person install an Arvika travel trailer bike rack?
Yes, one person can install an Arvika travel trailer bike rack, and I completed this installation myself. That said, it would be easier with two people during a few of the steps, especially when placing the main rack and lining up the washers, brackets, and bolts.
Why choose an Arvika bike rack for a travel trailer?
We like having an Arvika bike rack because it is a secure way to transport bicycles. The front-mounted design adds weight toward the hitch which works for our setup. Be sure to weigh your travel trailer and check your installation options to ensure it will work for you.
Arvika Discount Code
Arvika racks are sold factory direct. You can check out their line of RV bike racks at Arvika.ca
We like Arvika so much, we opted to become affiliates. If you would like to get an Arvika rack, consider using our affiliate code Travel10 to save 10%. As an affiliate, we may earn a small commission, which helps us run the channel at no extra cost to you.
Arvika Installation YouTube Video
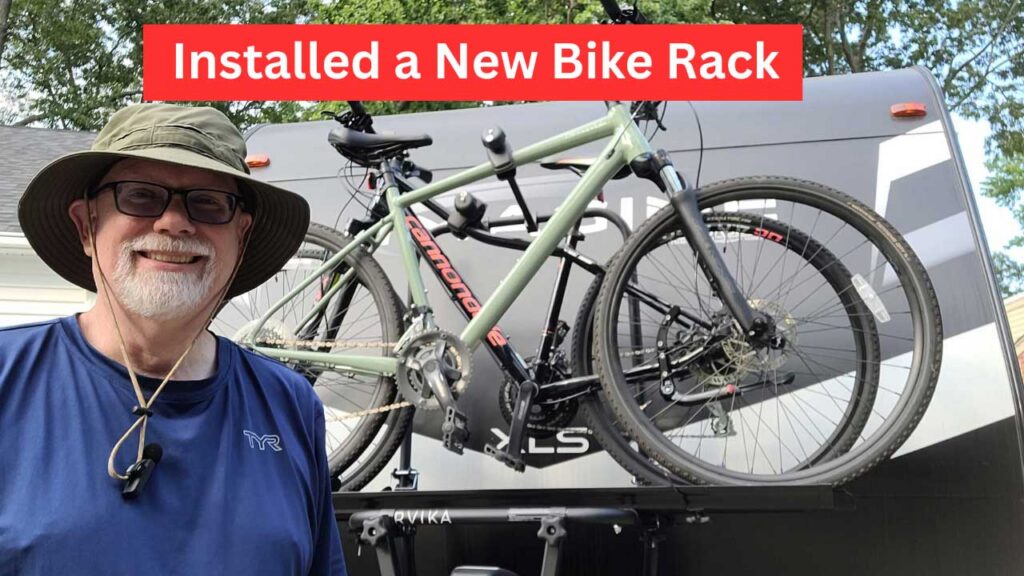
Want to see more? Check out our Arvika bike rack installation tips YouTube video where I share my experience with installing an Arvika bike rack on a travel trailer and walk through the process in more detail.
Other Arvika Bike Rack Rack Posts
Can’t get enough of our content on Arvika bike racks? Check out some of our earlier posts and videos.

Copyright 2026 Travel Trail Sail. All Rights Reserved.