Peach Cherry Dutch Oven Cobbler
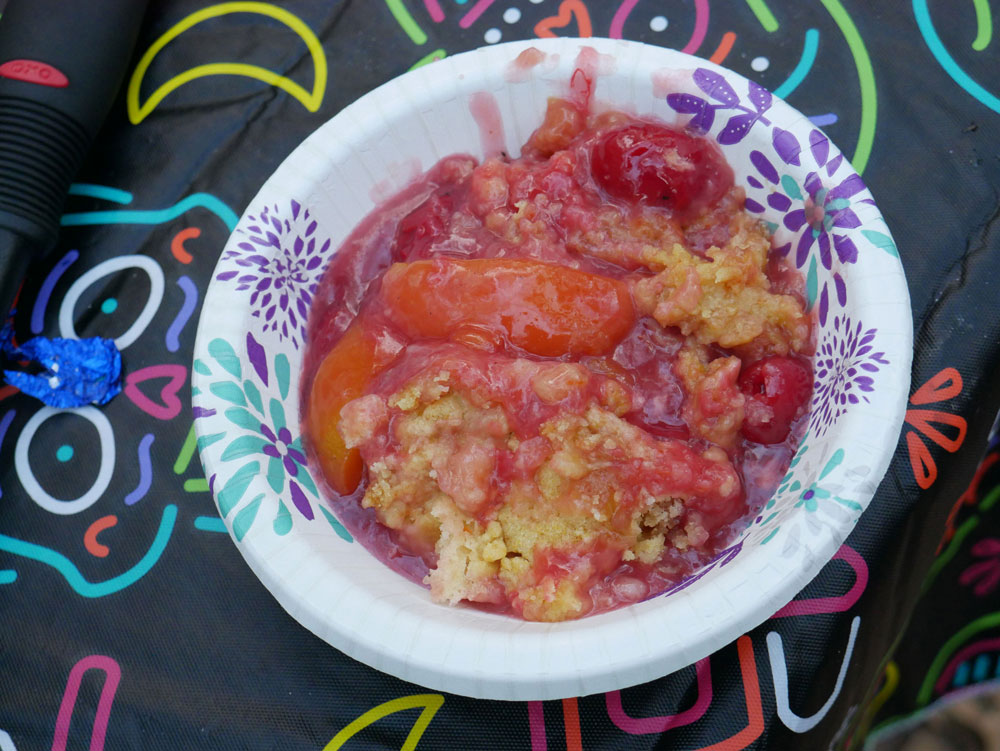
One of our favorite camp cooking traditions is making cobbler in a Dutch oven. Here is our recipe for the perfect peach cherry Dutch oven cobbler.
When Andres and I were in Scouts, two of the leaders Pat and Mike would bring along their Dutch ovens and make cobbler for the group. It was always a hit. Who wouldn’t like a warm dessert on a chilly night out in the woods. They were always trying different combinations of fruit and they were all tasty. Soon, I joined in with my own Dutch oven.
Now that we are RV campers, I keep the tradition alive whenever I get the chance. Not only is it a great tasting dessert, it is also a conversation starter. When I am cooking in a Dutch oven, camp neighbors often stop by to chat. Since I know that we have plenty, I’m happy to offer a helping of cobbler to anyone who wants a taste.
I have several Dutch oven cookbooks. If you are interested in trying Dutch Oven Cooking, the book I recommend to get started is Black Pot for Beginners by Mark Hansen. It provides clear directions and some great recipes to get started with.
Cooking in a Dutch oven is relatively easy. After some practice and experimentation, I can make a decent cobbler. Here is my recipe for the perfect peach cherry Dutch oven cobbler. Note that I’ve added Amazon links for your convenience in case you are interesting in trying Dutch oven cooking. These are affiliate links. If you choose to purchase from them there is no additional cost to you, but we earn a commission that helps enable us to continue sharing helpful information.
If you want to follow along with a video for making cobbler, check out our Peach Cherry Dutch Oven Cobbler YouTube video.
Peach Cherry Dutch Oven Cobbler Ingredients
- Two boxes of yellow cake mix
- One 15 ounce can of sliced peaches in light syrup
- One 21 ounce can of cherry pie filling
- One stick of butter
- About 1/4 cup of brown sugar
- One 12 ounce can of white soda
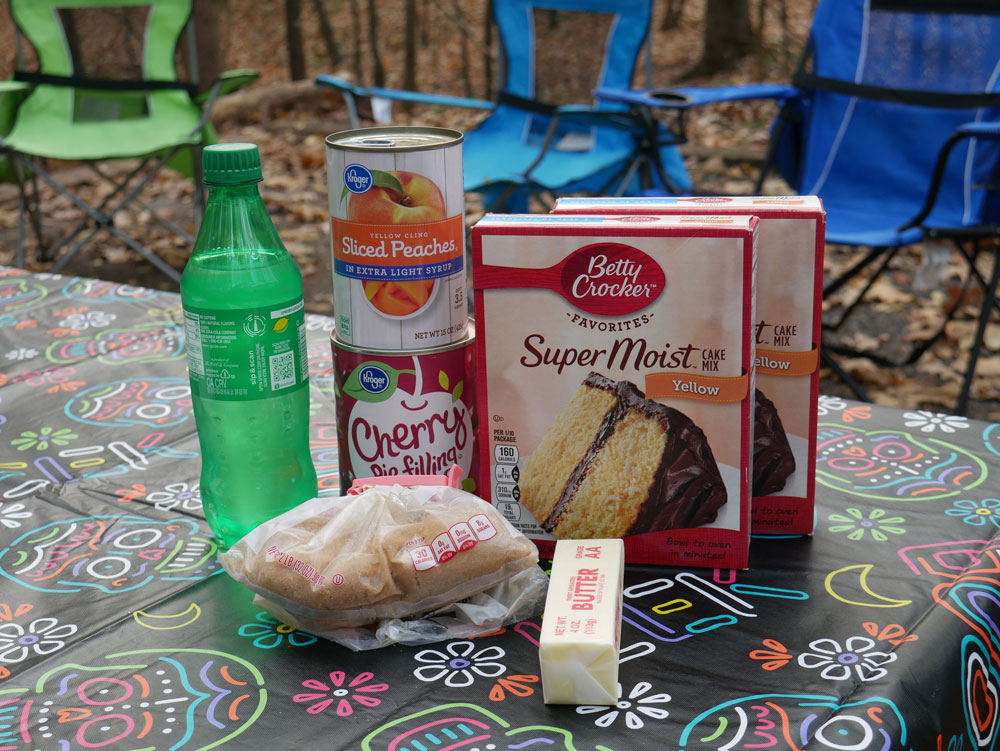
Dutch Oven Cooking Equipment
- A heat-proof cooking surface. The fire pit at a camp site usually works well.
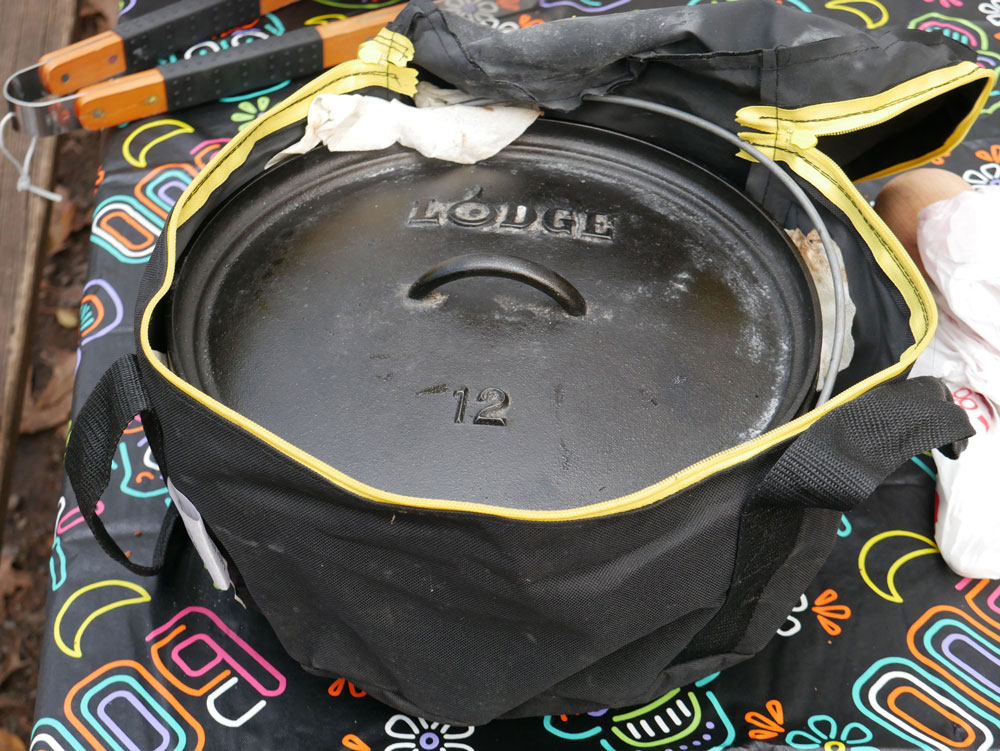
- A 12 inch cast iron Dutch oven with legs. I use a Lodge Dutch oven
- A clean place to set the lid. I use a Lodge lid stand
- A lid turner so that you can turn the pot and the lid. I use a Lodge lid turner
- A pair of tongs to move hot coals
- A large oven mitt
- A plastic scrub brush to clean the Dutch oven when you are done
- Vegetable oil to treat the oven after cleaning it
- Charcoal briquettes, regular not fast lighting
- A chimney and 2-3 sheets of paper to start the charcoal. I use a Weber Chimney Starter
- A bag to store your Dutch oven. The Lodge Dutch Oven Tote Bag works great
Preparing Peach Cherry Dutch Oven Cobbler
Begin by getting your coals ready. You’ll need at least 30 briquettes and some extra in reserve. Put the coals into a chimney starter, add a few sheets of paper in the bottom and then light the paper. Or, if you are like me and forget to bring newspaper, find some other paper to use like paper towels, paper plates or even the bag that the coals came in and then light that. In a few minutes, the coals will start to turn gray and you can pour them out of the chimney and on to a heat-proof surface. The chimney I use has two handles; one is fixed for you to hold the chimney and the other pivots to help you dump the coals. It works great.
Add your ingredients to the Dutch Oven. Start by adding the fruit. You can use any canned fruit. I like the combination of using one can of fruit and one can of pie filling. You can use two cans of the same fruit or mix two different kinds.
Next, add the two boxes of cake mix. My recipe for peach cherry cobbler calls for two boxes of yellow cake mix. Again, you really can use any flavor you like. Try chocolate cake mix with cherries. Or maybe a white cake mix with apple pie filling.
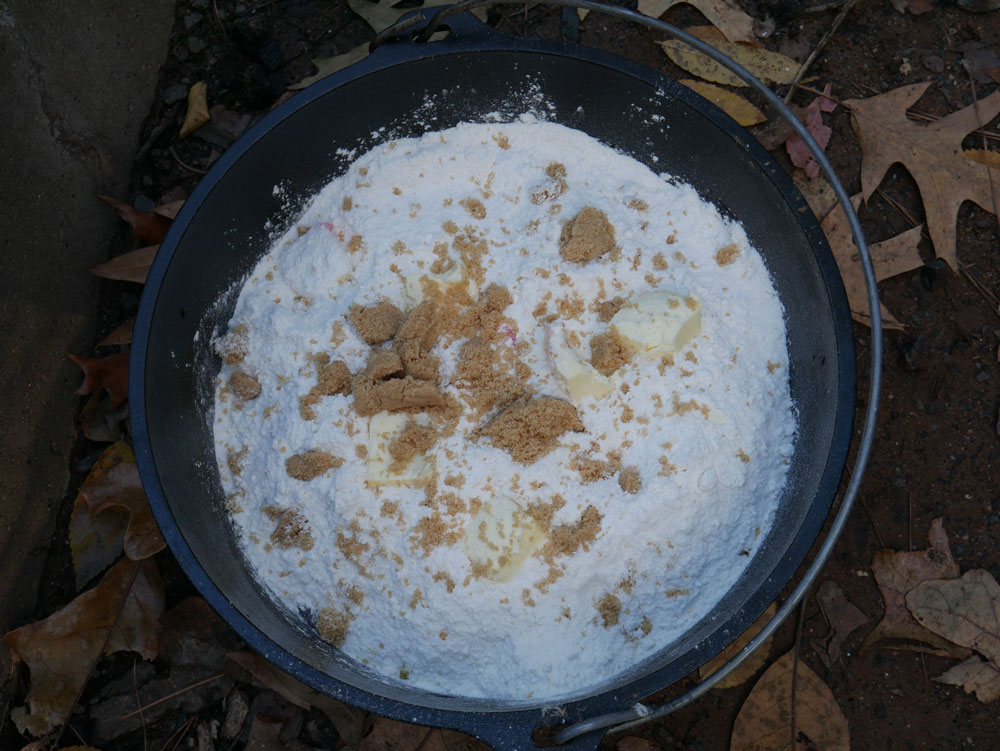
Cut the stick of butter into smaller pieces and add the butter to the oven. Add approximately 1/4 cup brown sugar. If you like, you can add additional ingredients like cinnamon, pumpkin pie spice, or whatever. For this recipe, I like to keep it pretty simple. Finally, add the can of soda. If you have a bottle of soda, it might get to be a bit too much so just add approximately 12 ounces of liquid. There is no need to stir or mix the ingredients. As the cobbler bakes, the liquid will steam and boil its way through the cake mix so that you end up with a perfectly mixed dessert.
Place the lid on the Dutch Oven. Spread about 15 coals on the ground in a space about the size of the bottom of the Dutch Oven. Place the oven on the coals. Then add another 15 coals to the lid.
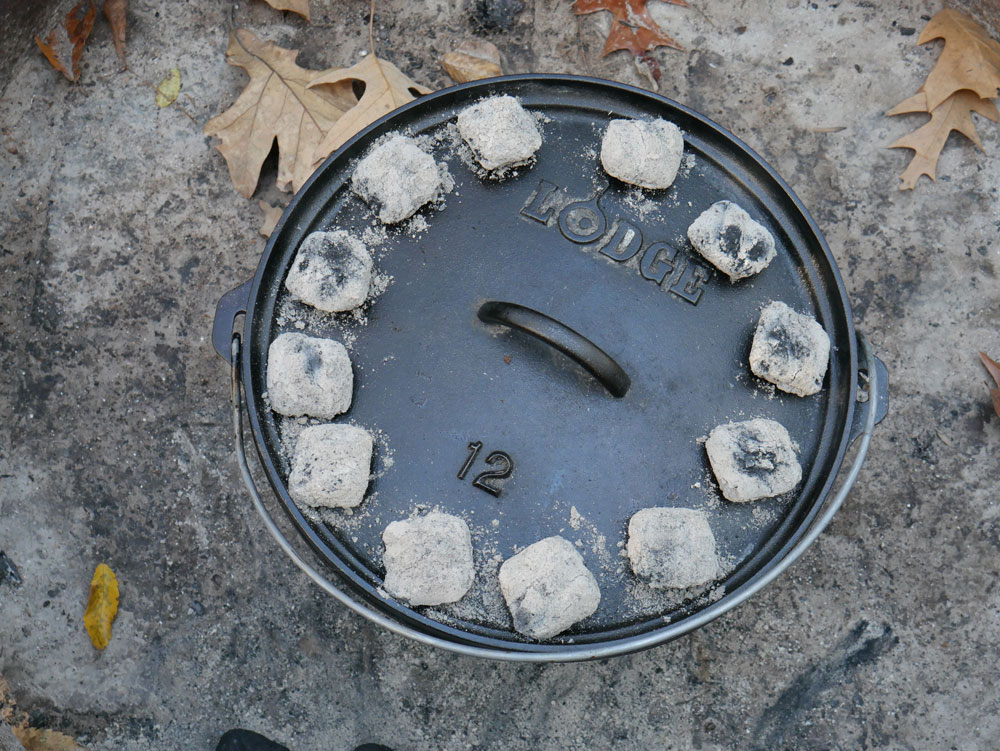
You may need to refresh the coals during cooking to keep the temperature warm enough. At this point, add a few more coals to any you have started but aren’t using yet. The new ones will light from being mixed in with the hot coals.
Set a timer for 15 minutes or just check your watch. Dutch oven cooking doesn’t require a lot of intervention but it does require some patience. Once the fifteen minutes have passed, use your lid turner to turn the lid 1/4 turn counter clockwise. Then, turn the whole oven 1/4 turn clockwise. This helps ensure the heat from the coals is moved to a different spot. It really doesn’t matter which direction you use, just use the same direction each time throughout the cooking process. The cobbler takes about an hour to bake so set your timer for another 15 minutes and repeat the process three more times.
After about an hour, the cobber should be done. Carefully remove the lid to that you don’t get coal ash into the food. The lid turner should have a way to tilt so that it keeps the lid steady as you move it. Place the lid in a clean space. I like using a lid stand as it provides a nice place to set the lid off the ground.
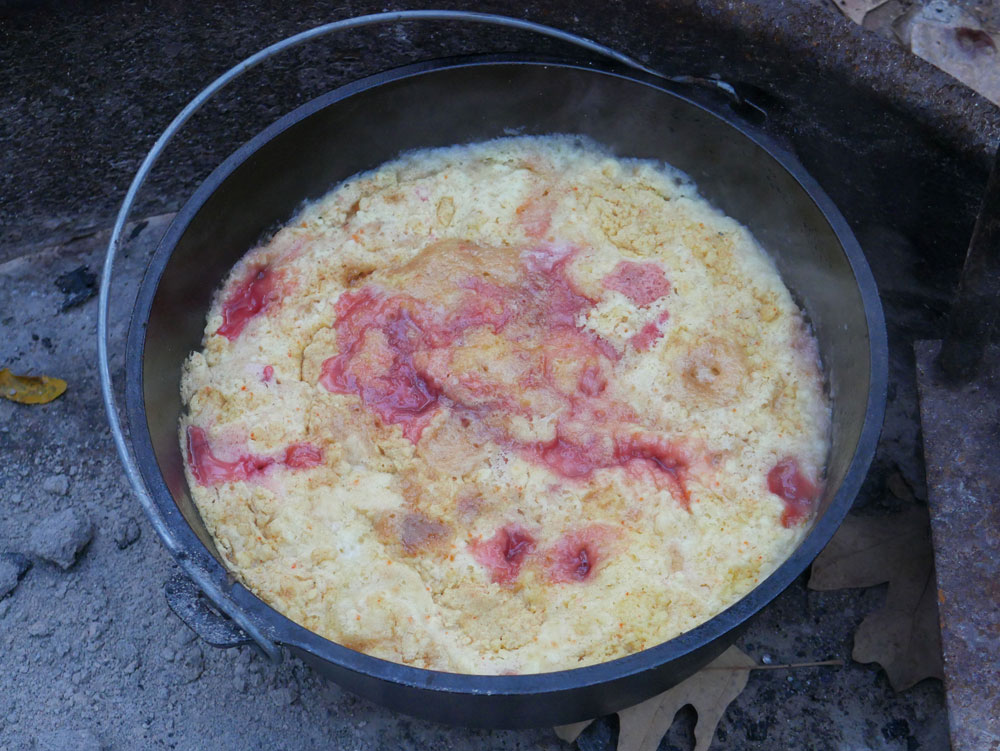
If you are ready for dessert, dig in. If you aren’t ready yet, the Dutch Oven with the lid on will keep the cobbler warm for a while. A wooden spoon works best but a plastic heat-proof spoon can also be used. Give everyone a generous spoonful of cobbler making sure to get both fruit and cake in each serving. Enjoy!
Cleaning The Dutch Oven
Dutch ovens are cast iron and can last a lifetime if cared for properly. Once the cobbler has cooled and everyone has had their fill, it’s time to clean the oven. Over time, cast iron builds up a protective black coating. You want to make sure to keep that protection in place. To clean the oven, never use soap. Simply scrape away any excess food, rinse with water and scrub with a plastic brush as needed. After the oven is clean, lightly coat it with vegetable oil and then place it in a Dutch Oven storage bag.
I hope you take the opportunity to try making cobbler in a Dutch Oven on your next camping trip. Be sure to leave a comment telling us how it went.
You might also like our recipe for Scotcheroos, a peanut butter and chocolate crispy rice treat. It’s one of our favorites.
Thanks for following along on our camping journey. If you are enjoying it, please leave us a comment and let us know your thoughts.
Products Mentioned
The products mentioned in this post available at Amazon and other outdoor retailers. Note: these is an affiliate links. If you choose to purchase by using the link there is no additional cost to you, but we earn a commission that helps enable us to continue sharing helpful information.
Book Black Pot for Beginners by Mark Hansen
Copyright 2019 Travel Trail Sail. All Rights Reserved.
